Key Takeaways
– 🛠️ Assess the damage to your leather car seat seam before starting the repair process to determine the appropriate technique and whether it requires professional assistance.
– 🧰 Gather all the necessary tools and materials, including a needle and thread, leather repair kit, scissors, cotton swabs, tweezers, and leather conditioner.
– 🧽 Prepare the leather surface by cleaning it with a mild soap and water solution and conditioning it with a leather conditioner before starting the repair.
– 🪡 Repair methods vary based on the extent and type of damage: use adhesive for small tears, a leather patch for larger tears, and a needle and thread or sewing awl for loose seams.
– ⏰ Allow sufficient drying and curing time for the repair to set properly, generally waiting at least 24 hours before using the car or sitting on the repaired seat.
– ✂️ Trim excess thread from the repaired area and blend the repaired area with the rest of the seat using leather dye or sandpaper if needed.
– 🧼 Regularly clean and condition your leather car seats every three to six months to prevent damage and extend their lifespan.
– 🛡️ Prevent future damage to your leather car seat seam by keeping sharp objects away from the seats, avoiding prolonged exposure to sunlight, and using seat covers for extra protection.
Your Guide on How To Repair A Leather Car Seat Seam Successfully
Are you tired of looking at that unsightly tear in your car’s leather seat? Whether it’s due to wear and tear or an unfortunate accident, a damaged leather car seat seam is a common issue that can be easily remedied with the right tools and techniques. In this comprehensive guide, we will walk you through the step-by-step process of repairing your leather car seat seam like a pro.

It’s essential to address this issue promptly to prevent further damage and prolong the lifespan of your car’s interior. With the right tools and materials, you don’t have to be a professional to fix a ripped or torn leather car seat seam. So, let’s dive into the process and restore your car’s interior to its original glory.
Assess the Damage
Before repairing a leather car seat seam, it is crucial to assess the extent of the damage. This will help determine the appropriate repair technique and whether it is a DIY fix or requires professional assistance.
Tip: It is recommended to repair the seam as soon as possible to prevent further damage and potential safety hazards.
The following are common types of damage to a leather car seat seam:
| Type of damage | Description |
|---|---|
| Small tear or rip | A small and clean tear or rip where the leather edges are still intact. |
| Large tear or rip | A larger tear or rip where the leather edges are frayed and not intact. |
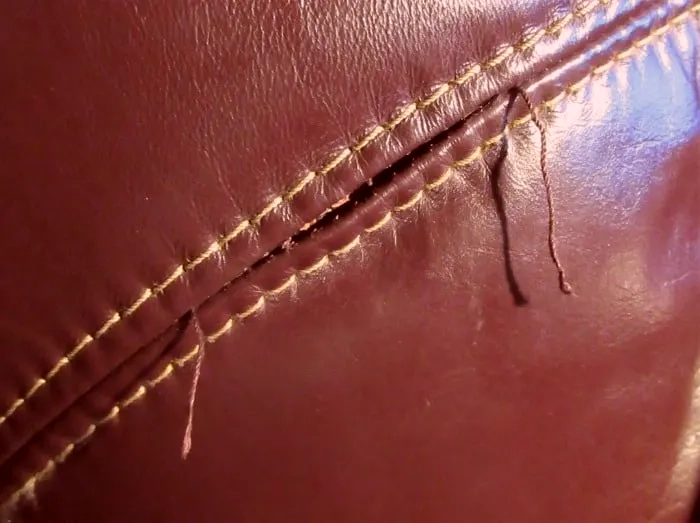
| Loose seam | When the thread holding the seam together has come loose, causing the leather to gap and pull apart. |
| Cracked seam | Typically caused by prolonged exposure to sunlight or extreme temperatures, resulting in the leather cracking and peeling away from the seam. |
Determining whether the damage can be repaired DIY or requires professional assistance will depend on the type of damage and your level of expertise. Small tears or loose seams are often DIY fixes, whereas large tears or cracked seams may require professional assistance.
How to Assess the Damage?
To assess the damage, follow these steps:
- Inspect the seam and try to identify the type of damage.
- Determine the extent of the damage and whether it can be repaired DIY or requires professional assistance.
- Consider your level of expertise and willingness to undertake the repair yourself.
Tip: If in doubt, consult with a professional before attempting any repairs on your own.
Gather the Necessary Tools and Materials
Before beginning any repair work, it is essential to gather all the necessary tools and materials. This will ensure that the repair process goes smoothly and efficiently. Here are the basic items you will need to repair a leather car seat seam:
| Tools | Materials |
|---|---|
| Needle and thread: Choose a heavy-duty thread that matches the color of your leather. | Leather repair kit: This kit should include a leather adhesive, patches, and a color-matching liquid. |
| Scissors: Use sharp scissors to cut leather patches or thread. | Cotton swabs: Use these to apply adhesive. |
| Tweezers: Use these to help pull the needle through the leather. | Leather conditioner: Apply this after the repair for added protection and a glossy finish. |
Depending on the extent of the damage, additional tools such as leather punches or a leather trimmer may be necessary. Make sure to assess the damage and determine the required tools before starting the repair process.
Prepare the Leather Surface
Before beginning the repair process, it’s essential to prepare the leather surface on the car seat. This involves cleaning the area thoroughly and conditioning the leather to ensure proper adhesion of the repair material.
To clean the leather, start by using a mild soap and water solution, and a soft-bristled brush to gently scrub the area. Avoid using harsh chemicals or excessive water, as this can damage the leather.
Once the area is clean, allow it to dry completely before proceeding with the repair.
To condition the leather, apply a small amount of leather conditioner to a clean cloth and rub it into the leather in a circular motion. This will help to restore the natural oils in the leather and improve its elasticity.
After conditioning the leather, wipe off any excess conditioner with a clean cloth and allow it to dry completely before moving on to the repair process.
Repairing the Seam For Car Seat
Once you have assessed the damage and gathered the necessary tools and materials, it’s time to start repairing the seam. The repair method will vary depending on the extent and type of damage.
- For small tears or rips, you can use adhesive to bond the edges together. Apply a small amount of adhesive to the torn area and press the edges together. Use a clamp or heavy object to keep the seam in place while the adhesive dries.
- For larger tears or rips, you may need to use a leather patch to cover the damaged area. Cut a patch from the included repair kit or a piece of matching leather fabric. Apply adhesive to the back of the patch and press it onto the damaged area, covering it completely. Use a clamp to keep it in place while the adhesive dries.
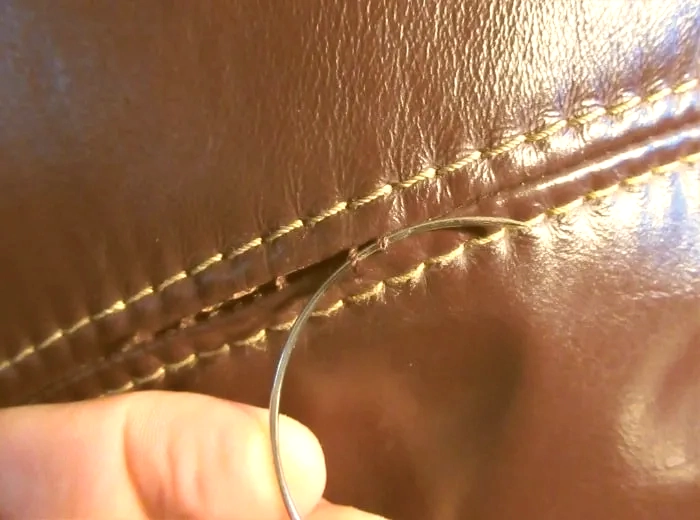
- If the seam has come apart but the leather is still intact, you can use a needle and thread to stitch it back together. Thread a needle with a strong, heavy-duty thread and tie a knot at the end. Insert the needle into the underside of the leather and pull it through to the top side, about 1/8 inch away from the seam. Insert the needle back into the underside of the leather, right next to the first stitch, and pull it through to the top side. Continue stitching in this manner until the entire seam is repaired. Tie a knot on the underside of the leather to secure the thread.
- For larger areas that need stitching, use a sewing awl to create a stronger, more secure stitch. A sewing awl is a tool that allows you to stitch leather without the need for a sewing machine. The awl creates small holes in the leather that you can thread the needle through. Follow the instructions included with the awl to create a strong, even stitch along the entire length of the seam.
Once you’ve completed the repair, allow the adhesive or stitching to dry and cure completely. Follow the manufacturer’s instructions for drying times, as it may vary depending on the type of adhesive or stitching used.
Remember, it’s important to take your time and do the repair correctly to ensure long-lasting results. Rushing the repair or using the wrong techniques can lead to further damage and a shorter lifespan for your leather car seat.
Allowing for Proper Drying and Curing
After repairing the leather car seat seam, the adhesive or stitching needs adequate time to dry and cure properly. Rushing this step can compromise the repair and cause it to fail prematurely. It is crucial to exercise patience and allow the repair to set properly for long-lasting results.
The drying and curing time can vary depending on the type and quantity of adhesive or stitching used and the surrounding temperature and humidity.
Generally, it is advisable to wait at least 24 hours before using the car or sitting on the repaired seat.
While waiting for the repair to dry, avoid exposing the car to direct sunlight or high temperatures, which can cause the adhesives to weaken or dry out too quickly. Also, refrain from touching or moving the repaired area until it has fully cured to prevent any unnecessary strain or damage.
By allowing adequate drying and curing time, you can ensure that the repair sets properly, and the seam stays secure for a long time to come.
Final Touches and Restoration
Now that your leather car seat seam is repaired, it’s time to focus on the final touches to restore its appearance. We’ve put together some tips to help you achieve a professional-looking finish.
Trim Excess Thread
Using a sharp pair of scissors or a seam ripper, carefully trim any excess thread from the repaired area. Be sure to cut as close to the seam as possible without damaging the repaired area or the rest of the leather.
Blend the Repaired Area
If your repair involved stitching, use a leather dye or marker to color the thread to match the rest of the seat. This will help blend the repaired area with the surrounding leather, creating a seamless appearance.
If you opted for an adhesive repair, use a sandpaper or a leather sanding pad to smooth the edges of the adhesive area. This will help to avoid any bumps or unevenness, creating a smooth surface to blend with the rest of the leather.
Apply Leather Conditioner
After the repair, it’s important to moisturize and protect your leather. Use a high-quality leather conditioner to keep the leather supple and prevent cracking or drying out. Apply the conditioner lightly and evenly to the entire seat to maintain a consistent look and feel.
Protect Your Seats
To keep your seats looking their best, it’s essential to protect them from damage. Avoid exposing them to direct sunlight for extended periods, as this can cause fading and drying. Also, avoid using harsh chemicals or abrasive cleaners that can strip away the leather’s natural oils and cause damage over time.
Regular cleaning and conditioning can help maintain the beauty of your leather car seats. Try to clean them at least once a month with a natural leather cleaner and conditioner, and wipe up any spills immediately to prevent staining.
Preventive Measures and Maintenance Tips
Repairing your leather car seat seam is just the first step towards ensuring the longevity of your car’s interior. Here are some preventive measures and maintenance tips to avoid future damage and keep your leather seat looking pristine for years to come:
- Keep your car out of direct sunlight: Prolonged exposure to sunlight can cause the leather to fade, crack, and dry out. Try to park your car in a shaded area or use a sunshade to protect your leather seats.
- Clean your leather seats regularly: Dirt, dust, and grime can accumulate on your leather seats over time, causing discoloration and stiffness. Use a pH-balanced leather cleaner and a soft-bristled brush to clean your seats at least once a month.
- Apply a leather conditioner: Leather conditioner helps to keep the leather supple and moisturized, preventing it from cracking and drying out. Apply a high-quality leather conditioner every few months to keep your seats looking and feeling their best.
- Avoid sharp objects and abrasive materials: Sharp objects like keys and pens can scratch and puncture your leather seats, while abrasive materials like sandpaper can cause significant damage. Be careful when placing items on your seats and avoid using harsh cleaning materials.
- Use seat covers: Seat covers provide an extra layer of protection for your leather seats, shielding them from spills, stains, and wear and tear. Invest in a high-quality seat cover to extend the life of your car’s interior.
By following these preventive measures and maintenance tips, you can help to prevent future damage to your leather car seat seam and maintain the overall aesthetic appeal of your car’s interior.
FAQs About How To Repair A Leather Car Seat Seam
Q: Can I repair a large tear in a leather car seat seam?
A: It depends on the severity and location of the tear. It is generally recommended to seek professional assistance for large tears to ensure a successful repair.
Q: How long does the repair process take?
A: The repair process can take anywhere from a few hours to a day depending on the complexity of the damage and the selected repair method. It is important to allow sufficient time for the adhesive or stitching to dry and cure properly.
Q: What should I do if the repaired area looks different from the rest of the seat?
A: To blend the repaired area with the rest of the seat, you can try using leather dye or a leather colorant. It is important to match the color as closely as possible to avoid any noticeable differences.
Q: How often should I clean and condition my leather car seats?
A: It is recommended to clean and condition your leather car seats every three to six months, depending on usage. Regular maintenance can help prevent damage and extend the lifespan of your car’s interior.
Q: Can I prevent future damage to my leather car seat seam?
A: Yes, by taking proper preventive measures such as keeping sharp objects away from the seats, avoiding prolonged exposure to sunlight, and regularly cleaning and conditioning the leather.
Conclusion: How To Repair A Leather Car Seat Seam?
Repairing a leather car seat seam may seem like a daunting task, but with the right tools, materials, and guidance, it can be easily accomplished.
Remember to assess the damage, gather the necessary tools and materials, prepare the leather surface, repair the seam, allow for proper drying and curing, and apply the final touches and restoration.
By following these steps and practicing regular maintenance, you can extend the lifespan of your car’s interior and save yourself the cost of expensive professional repairs.
Don’t wait until the damage becomes irreparable; take action now and restore your car’s leather seats to their former glory.
If you have any further questions or concerns about repairing a leather car seat seam, please refer to our FAQ section for more information. Thank you for reading and happy repairing!